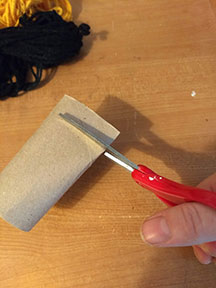
1. Cut a strip from your cardboard tube. You only need a fairly thin strip. My tube was from a roll of toilet paper and I was able to cut four, with some left over.
2. Cut your yarn into even lengths. The number and size may depend on the size of cardboard tube you have and the thickness of your yarn, so experiment with that. But for reference, I cut my yarn to about 12 inches or 30 centimeters, and I needed 18 pieces for the primary color and 9 pieces for the secondary color.

3. Take your first piece of yarn and fold it in half. Place it under the tube with loop sticking out at one side. Then take the two end pieces, wrap them over the top of the tube and through the loop, pulling taut to secure the yarn.
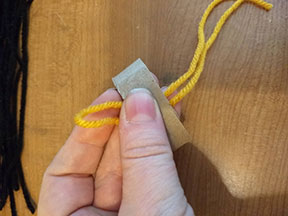
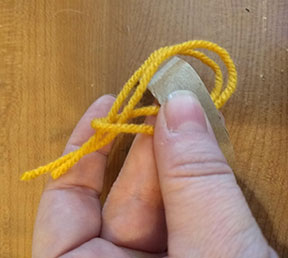
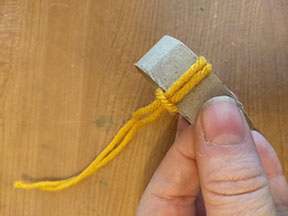
4. Repeat step 3 until the entire cardboard tube is covered. I did a pattern of two primary color and one secondary color for each of the houses, but if you prefer your stripes to be the same size, of course you can change that and do whatever you'd like.
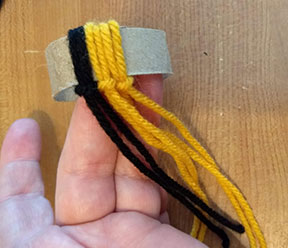
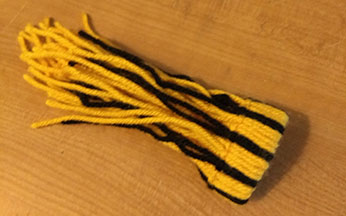
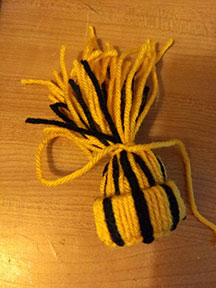
5. Now grasp all of the lengths of yarn in one hand, twist them all together, and push them up through the tube to the other side. This will give the little hats the appearance of having them cuffed on the bottom. The first pic is in the process of that step - it was tough getting a good picture of that with one hand lol, so I hope that makes sense.
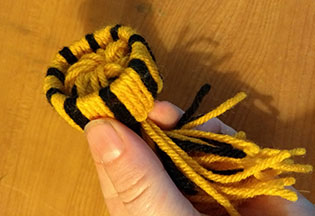
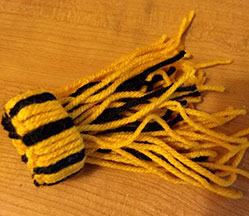
6. At this point, I tried to straighten all the stripes. Then take a small piece of tissue paper (or any type of "soft" paper), ball it up, and place it inside the hat to retain the shape. Take another piece of yarn and tie all the pieces of yarn together. Trim them to make the pom-pom top. Et voila! A mini yarn hat!
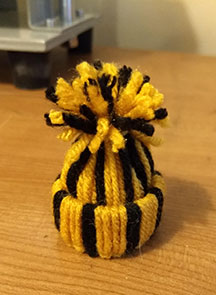
7. If you'd like to make this an ornament for your tree or to tie onto a wrapped gift, simply tie and loop another piece of yarn under the pom-pom.

If you have any questions or something does not seem clear, feel free to privately message me. And if you decide to make one, please show me!